Google Pay
Merchants seek payment methods that enable quick, easy, and secure purchases. Google Pay provides high conversion rates by leveraging these qualities.


How It Works
Features
- Type: e-wallet
- Channel:
- Online Payments
- In-Person Payments
- Operations:
- Sales
- Partial Refund
- Full Refund
- Cancellations
Integration
The integration for in-person payments is automatic and supported on all PIN Pads.
The integration for the e-commerce channel consists of two parts: frontend component and backend.
You can integrate the solution as part of a redirect/hpp or as a component. This section will guide you on integrating it as a button you can place anywhere on the merchant's website.
Frontend Component
On the frontend, you should use the specific Google guide. In the following code example, you can see a JavaScript and CSS example based on Google’s official guide, which would be fully functional.
If you examine the example JavaScript code, you’ll notice placeholders as comments with the following content:
// BEGIN SIPAY CUSTOMIZE
// END SIPAY CUSTOMIZE
The code between these comments is what you will need to customize based on your configuration and business processes, including:
- Information about supported cards
- Gateway connection configuration
- Google setup for the Merchant
- Customizing amount, currency, and other parameters
- Processing the transaction and handling the result
1. Information about Supported Cards
By configuring the array values, you can filter the types of supported cards.
// BEGIN SIPAY CUSTOMIZE
const allowedCardNetworks = [
  "AMEX",
  "DISCOVER",
  "INTERAC",
  "JCB",
  "MASTERCARD",
  "VISA",
];
// END SIPAY CUSTOMIZE
2. Gateway Connection
The gateway value will always be sipay in any environment.
The gatewayMerchantId parameter should have the value of the key name provided to you.
// BEGIN SIPAY CUSTOMIZE
const tokenizationSpecification = {
  type: "PAYMENT_GATEWAY",
  parameters: {
    gateway: "sipay",
    gatewayMerchantId: "key_value", // <- One value per merchant
  },
};
// END SIPAY CUSTOMIZE
3. Google Configuration for the Merchant
Depending on the environment, you will need to configure the merchantId provided during onboarding in Google. The merchantName value is a visual element that will appear when confirming the purchase.
// BEGIN SIPAY CUSTOMIZE
// merchantId: '12345678901234567890', // <- ONLY FOR LIVE AFTER ONBOARDING
merchantName: "Comercio de Demo";
// END SIPAY CUSTOMIZE
4. Order Information
You should provide the minimum level of detail about the purchase amount. Additional options are available to itemize the order.
// BEGIN SIPAY CUSTOMIZE
function getGoogleTransactionInfo() {
  return {
    displayItems: [
      {
        label: "Subtotal",
        type: "SUBTOTAL",
        price: "11.00",
      },
      {
        label: "Tax",
        type: "TAX",
        price: "1.00",
      },
    ],
    countryCode: "ES",
    currencyCode: "EUR",
    totalPriceStatus: "FINAL",
    totalPrice: "12.00",
    totalPriceLabel: "Total",
  };
}
// END SIPAY CUSTOMIZE
5. Transaction Processing
You should specify the URL of the merchant's backend where the transaction will be processed. In this example, we use a placeholder URL.
            // BEGIN SIPAY CUSTOMIZE
          axios.post('https://enthw1wyfvw932p.m.pipedream.net', paymentData,{headers: { 'Access-Control-Allow-Origin': '*' }})
              .then(function (response) {
                  // Check if code equals 0
                  console.log('### BEGIN response authorization ###')
                  console.log(response);
                  console.log('*** END response authorization ***')
                  if(response.data.payload.code == 0) {
                      // resolve({});
                      resolve(response.data);
                  } else {
                      reject(response.data);
                  }
              })
      }, 3000);
      // END SIPAY CUSTOMIZE
You can use these additional guides to customize the payment experience:
- Main guide: https://developers.google.com/pay/api/web/guides/tutorial
- Button options: https://developers.google.com/pay/api/web/reference/request-objects#ButtonOptions
- Button appearances: https://developers.google.com/pay/api/web/guides/brand-guidelines
Backend Component
The backend must receive this data from the frontend. The first message it will receive is a JSON containing encrypted card information:
{
  "apiVersionMinor": 0,
  "apiVersion": 2,
  "paymentMethodData": {
    "description": "Mastercard •••• 4784",
    "tokenizationData": {
      "type": "PAYMENT_GATEWAY",
      "token": "{\\"signature\\":\\"MEUCItruncated\\",\\"protocolVersion\\":\\"ECv1\\",\\"signedMessage\\":\\"{\\"encryptedMessage\\":\\"0uuIAaGUfz4itruncated\\",\\"ephemeralPublicKey\\":\\"BH20TBU6atruncated\\",\\"tag\\":\\"8lPPGv8eVFgrEFS7DvAtruncated\\"}\\"}"
    },
    "type": "CARD",
    "info": { "cardNetwork": "MASTERCARD", "cardDetails": "4784" }
  }
}
The backend should extract the tokenizationData part and rename it to paymentMethodToken:
{
  "paymentMethodToken": {
    "type": "PAYMENT_GATEWAY",
    "token": "{\\"signature\\":\\"MEQCIEDHoyh35truncated\\",\\"protocolVersion\\":\\"ECv1\\",\\"signedMessage\\":\\"{\\"encryptedMessage\\":\\"L2G5BRXCTYMaNntruncated\\",\\"ephemeralPublicKey\\":\\"BBK3vkOttruncated\\",\\"tag\\":\\"FI7yRVfw+UYSCkuRSFtruncated\\"}\\"}"
  }
}
Note that the content of token appears similar to a JSON, but it is actually an escaped string. It should not be manipulated, as it needs to be passed as an escaped string from the frontend. We will create a new JSON message with the following content:
{
  "key": "key",
  "resource": "resource",
  "nonce": "4860340691446",
  "mode": "sha256",
  "payload": {
    "amount": 10,
    "currency": "EUR",
    "catcher": {
      "type": "gpay",
      "token_gpay": "{\"signature\":\"MEUCICwaYtruncatedp6o\\u003d\",\"protocolVersion\":\"ECv1\",\"signedMessage\":\"{\\\"encryptedMessage\\\":\\\"Yid736uBrEfMDec4truncatedheaS5nuMfk\\\\u003d\\\",\\\"tag\\\":\\\"CWNjLYOvqgVme2atruncatedUA\\\\u003d\\\"}\"}"
    }
  }
}
At this point, we will have confirmed the final transaction amount and currency. We will sign the request with the assigned secret and send the message to the following endpoint:
Live: POST https://live.sipay.es/mdwr/v1/authorization
Sandbox: POST https://sandbox.sipay.es/mdwr/v1/authorization
The response will contain the transaction result, allowing us to close the order. If payload.code = 0 is returned, we can consider the transaction successfully completed.
{
  "type": "success",
  "code": "0",
  "detail": "authorization",
  "description": "Authorization processed successfully",
  "payload": {
    "code": "0",
    "amount": "10",
    "currency": "EUR",
    "order": "f3a8e8ad84664dtruncated",
    "card_trade": "consumer",
    "card_type": "mixed",
    "masked_card": "4548 81** ****7774",
    "reconciliation": "",
    "transaction_id": "0000273truncated",
    "cof_id": "7920213truncated",
    "authorizator": "OTROS ESPAÑA",
    "approval": "452587",
    "card_country": 724,
    "card_brand": "VISA"
  },
  "uuid": "3ad49da6-d031-4c8truncated",
  "request_id": "61b34fc23b1c1rtruncated"
}
Observations
The merchant's backend must allow receiving XHR requests. Therefore, requests should originate from the same domain where the frontend is hosted, or CORS should be enabled on the server side.
Onboarding
The merchant must create an account on Google Business and access the console. The final goal is for Google to provide a numeric identifier, called MerchantID, enabling the merchant to operate in production.
Here is the link to access it directly:
https://payments.developers.google.com/signup
The page should look similar to the following:

Access the “Google Pay API” option. On this new page, look for the “Integrate with your website” section and find the button:

Once inside, the merchant should fill in all fields:
- The website URL where Google Pay payments are allowed.
- Integration type: gateway.
Upload the following screenshots as evidence for each stage of the payment process. Attached below are sample images as representative examples, not necessarily matching the merchant's specific setup:
- Item Selection: where the user selects products on the website.
- Pre-purchase screen: the screen where the user is ready to make the purchase.
- Payment Method Screen: screen showing payment methods.
- Google Pay API payment screen: screen displaying Google Pay payment details. This is where the user is logged into Google and selects one of the available cards.
- Post-purchase screen: screen displaying the successful payment completion result.
Once the information is complete, look for the button to submit the information to Google for review.

Once the application is approved, this new message will appear:

If not approved, Google will notify the merchant of the steps and corrections needed.
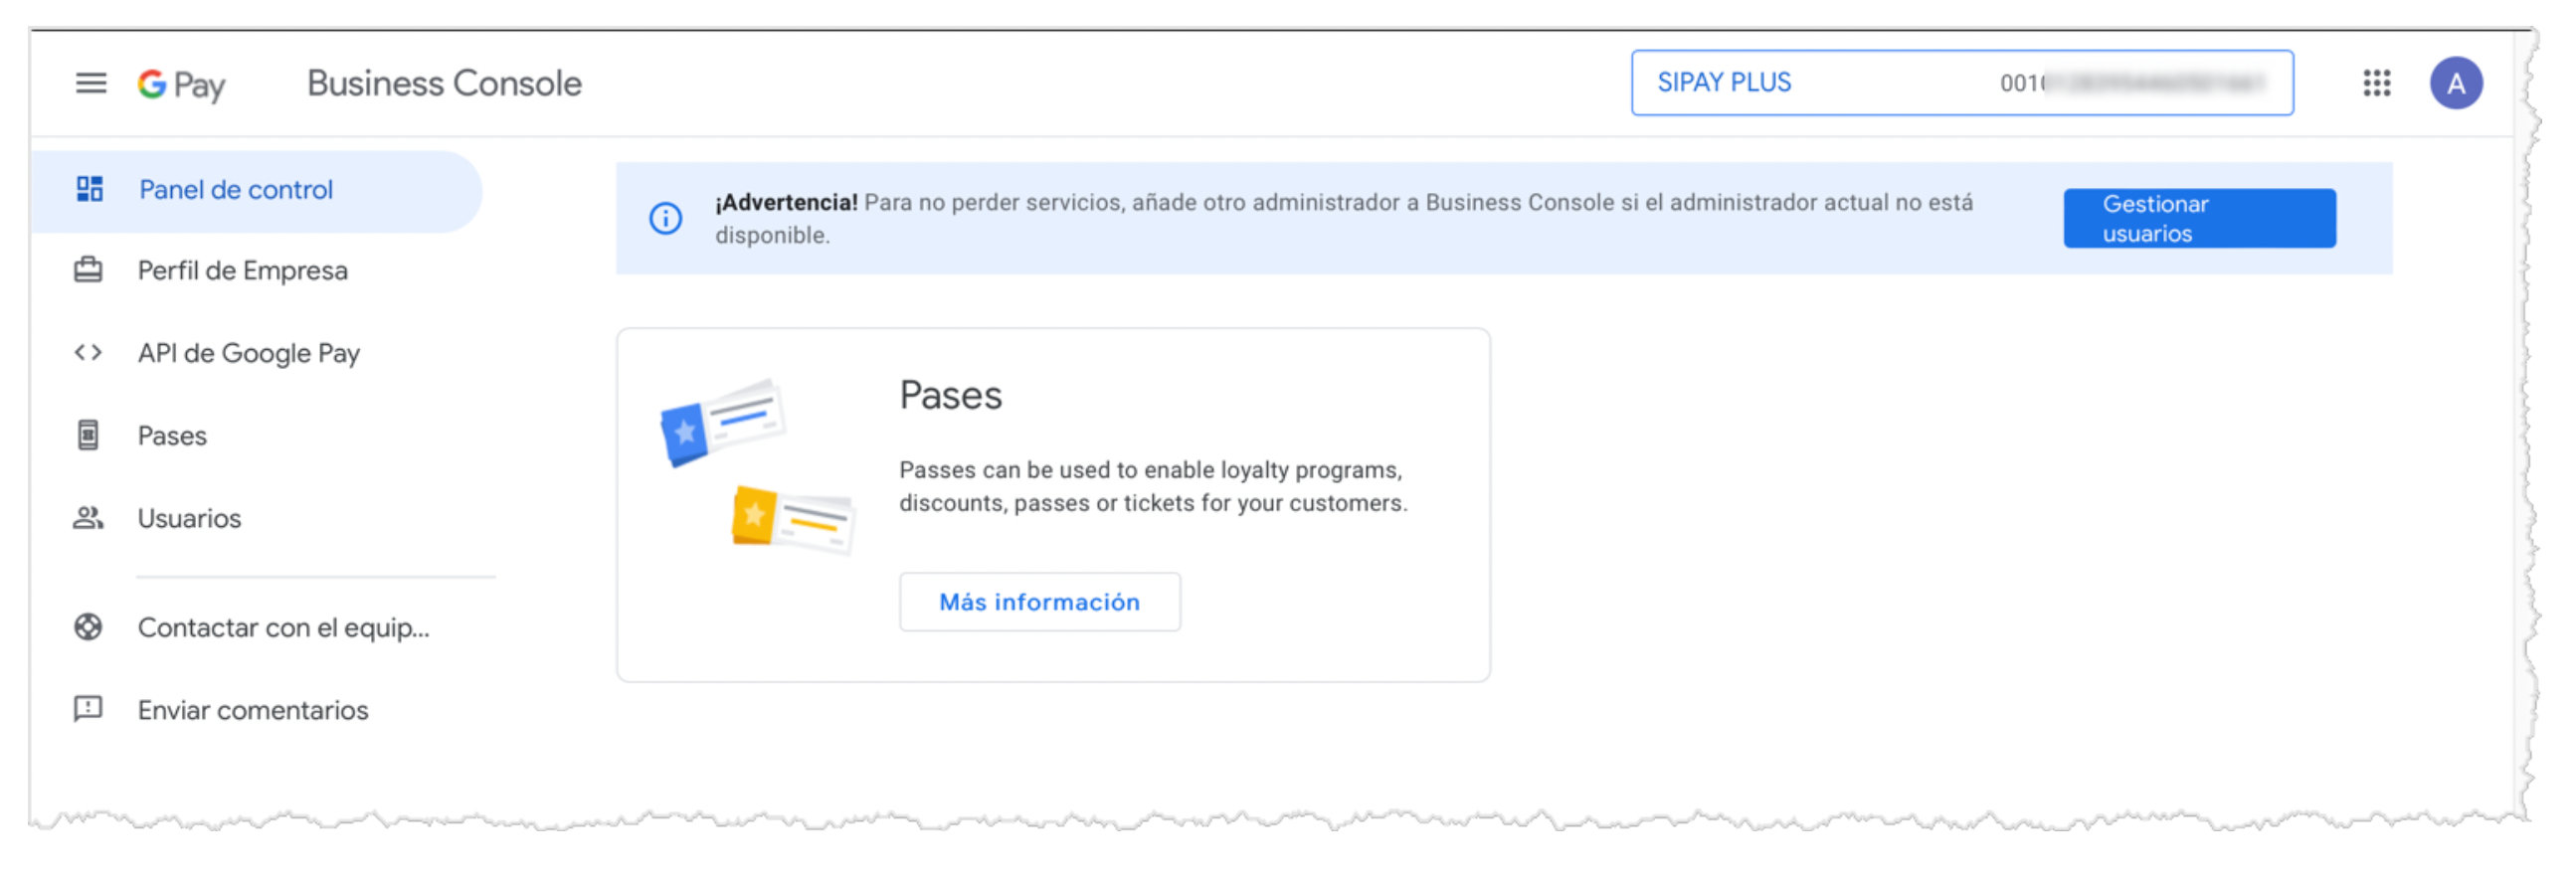
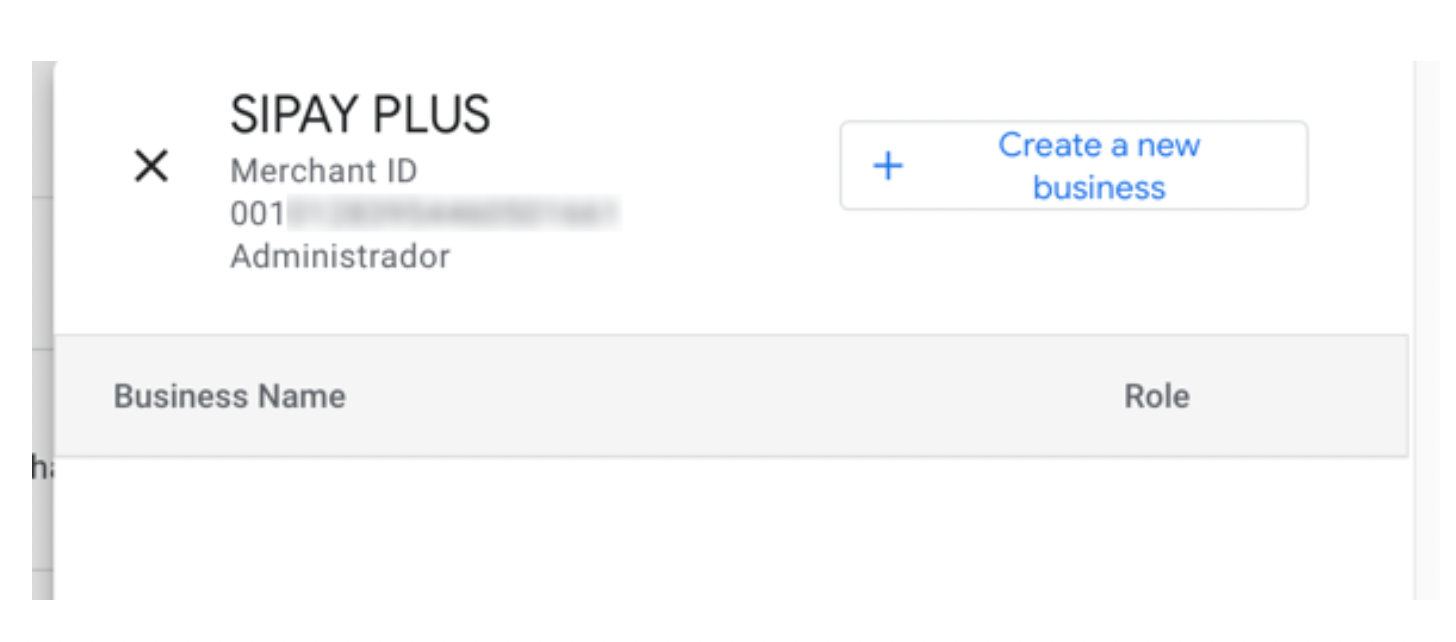
Upon successful approval, the merchant will obtain the MerchantID, which will appear in the upper-right corner of the Google Business console:

The merchant should provide the MerchantID to their Sipay contact to complete the setup.
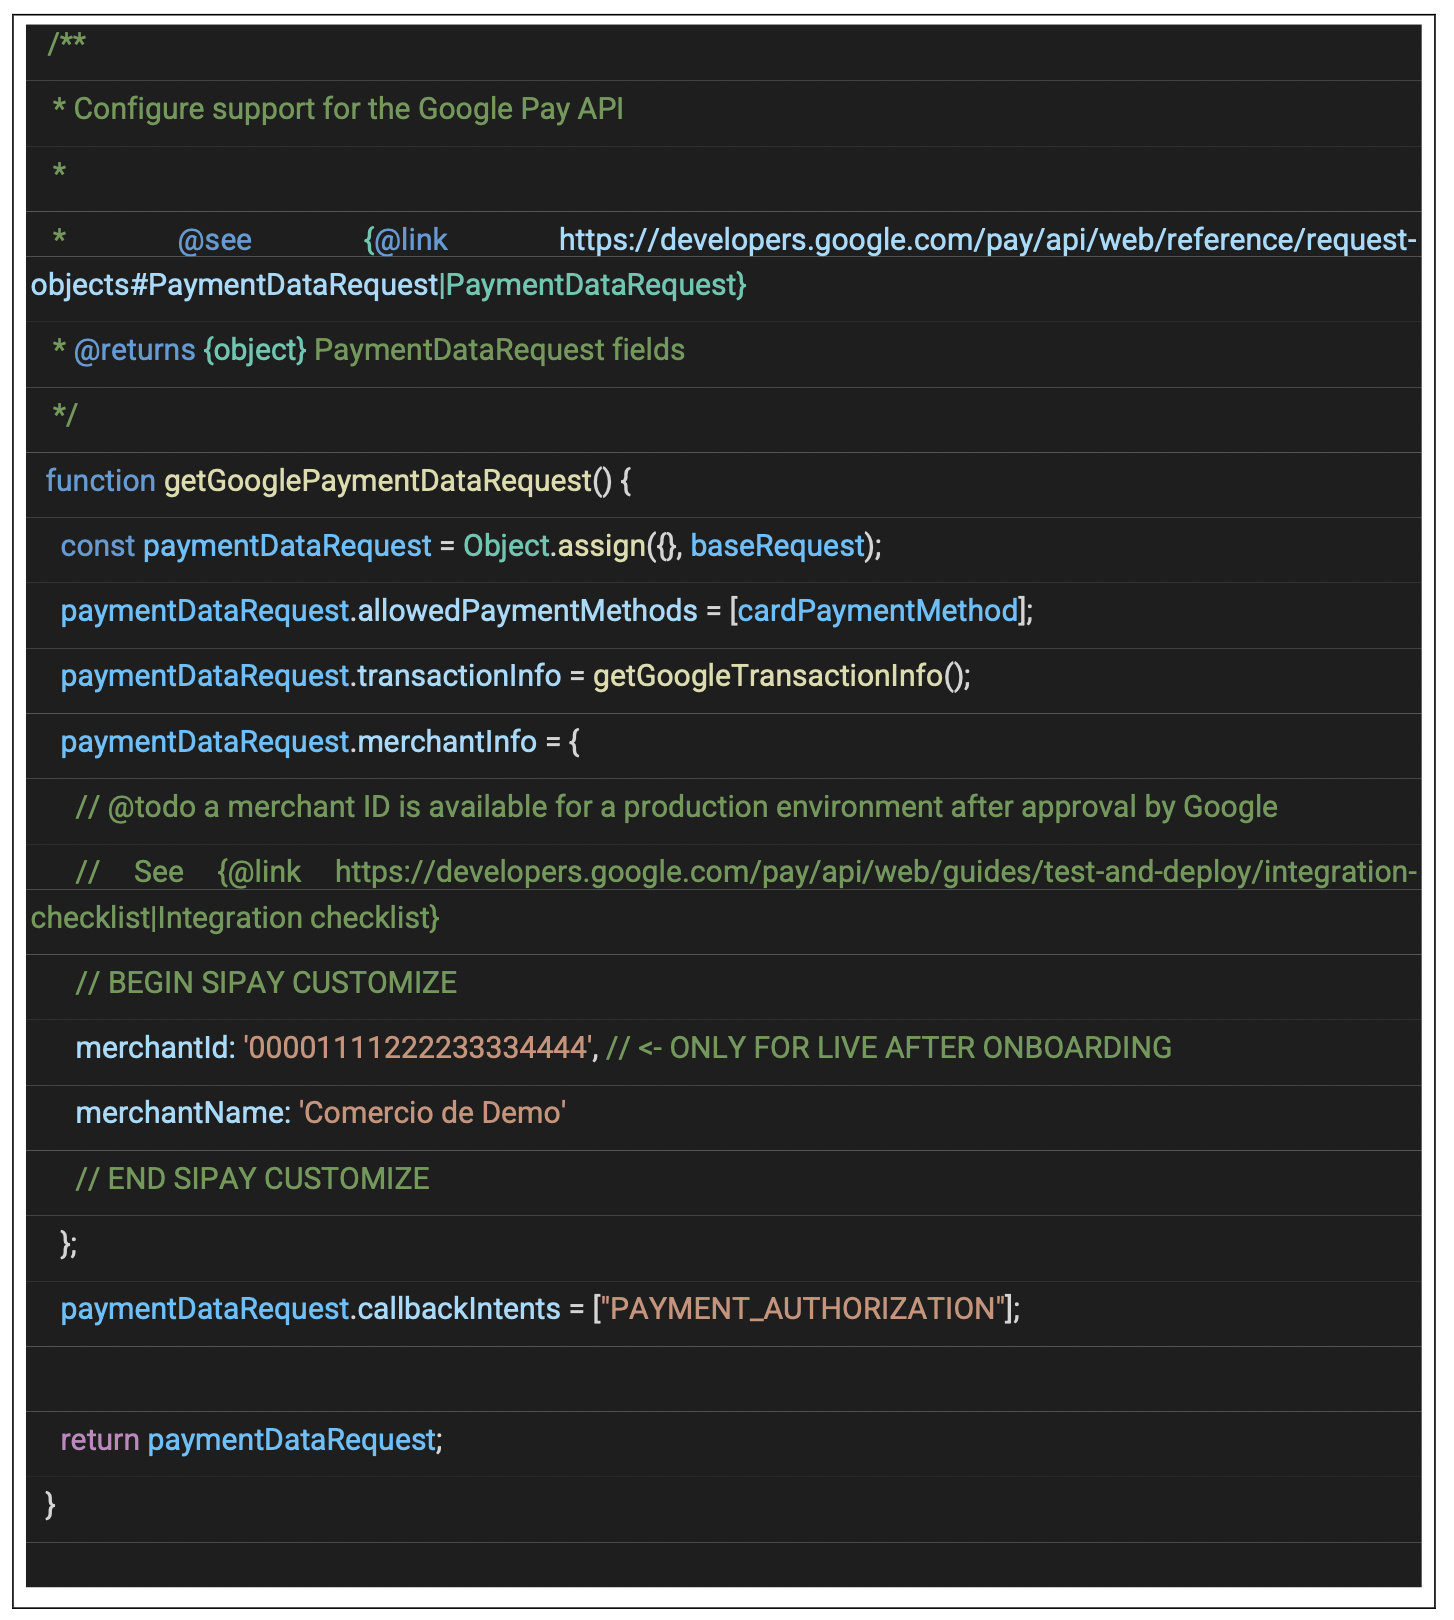
If the merchant has implemented a direct integration (JavaScript-based) with Google Pay, the integrator must add the MerchantID in the code.
Below is a code example showing how the getGooglePaymentDataRequest function should look when moving to production, assuming a fictitious MerchantId of 00001111222233334444:
